Wedding Sampler
Just before Christmas I went to a friend’s wedding reception. It was a “no presents” wedding as we contributed to their wishing well, but I thought I’d make a wedding photo frame sampler as a gift, since it’s what I do, and you can never have too many photos frames, especially to put wedding photos in!
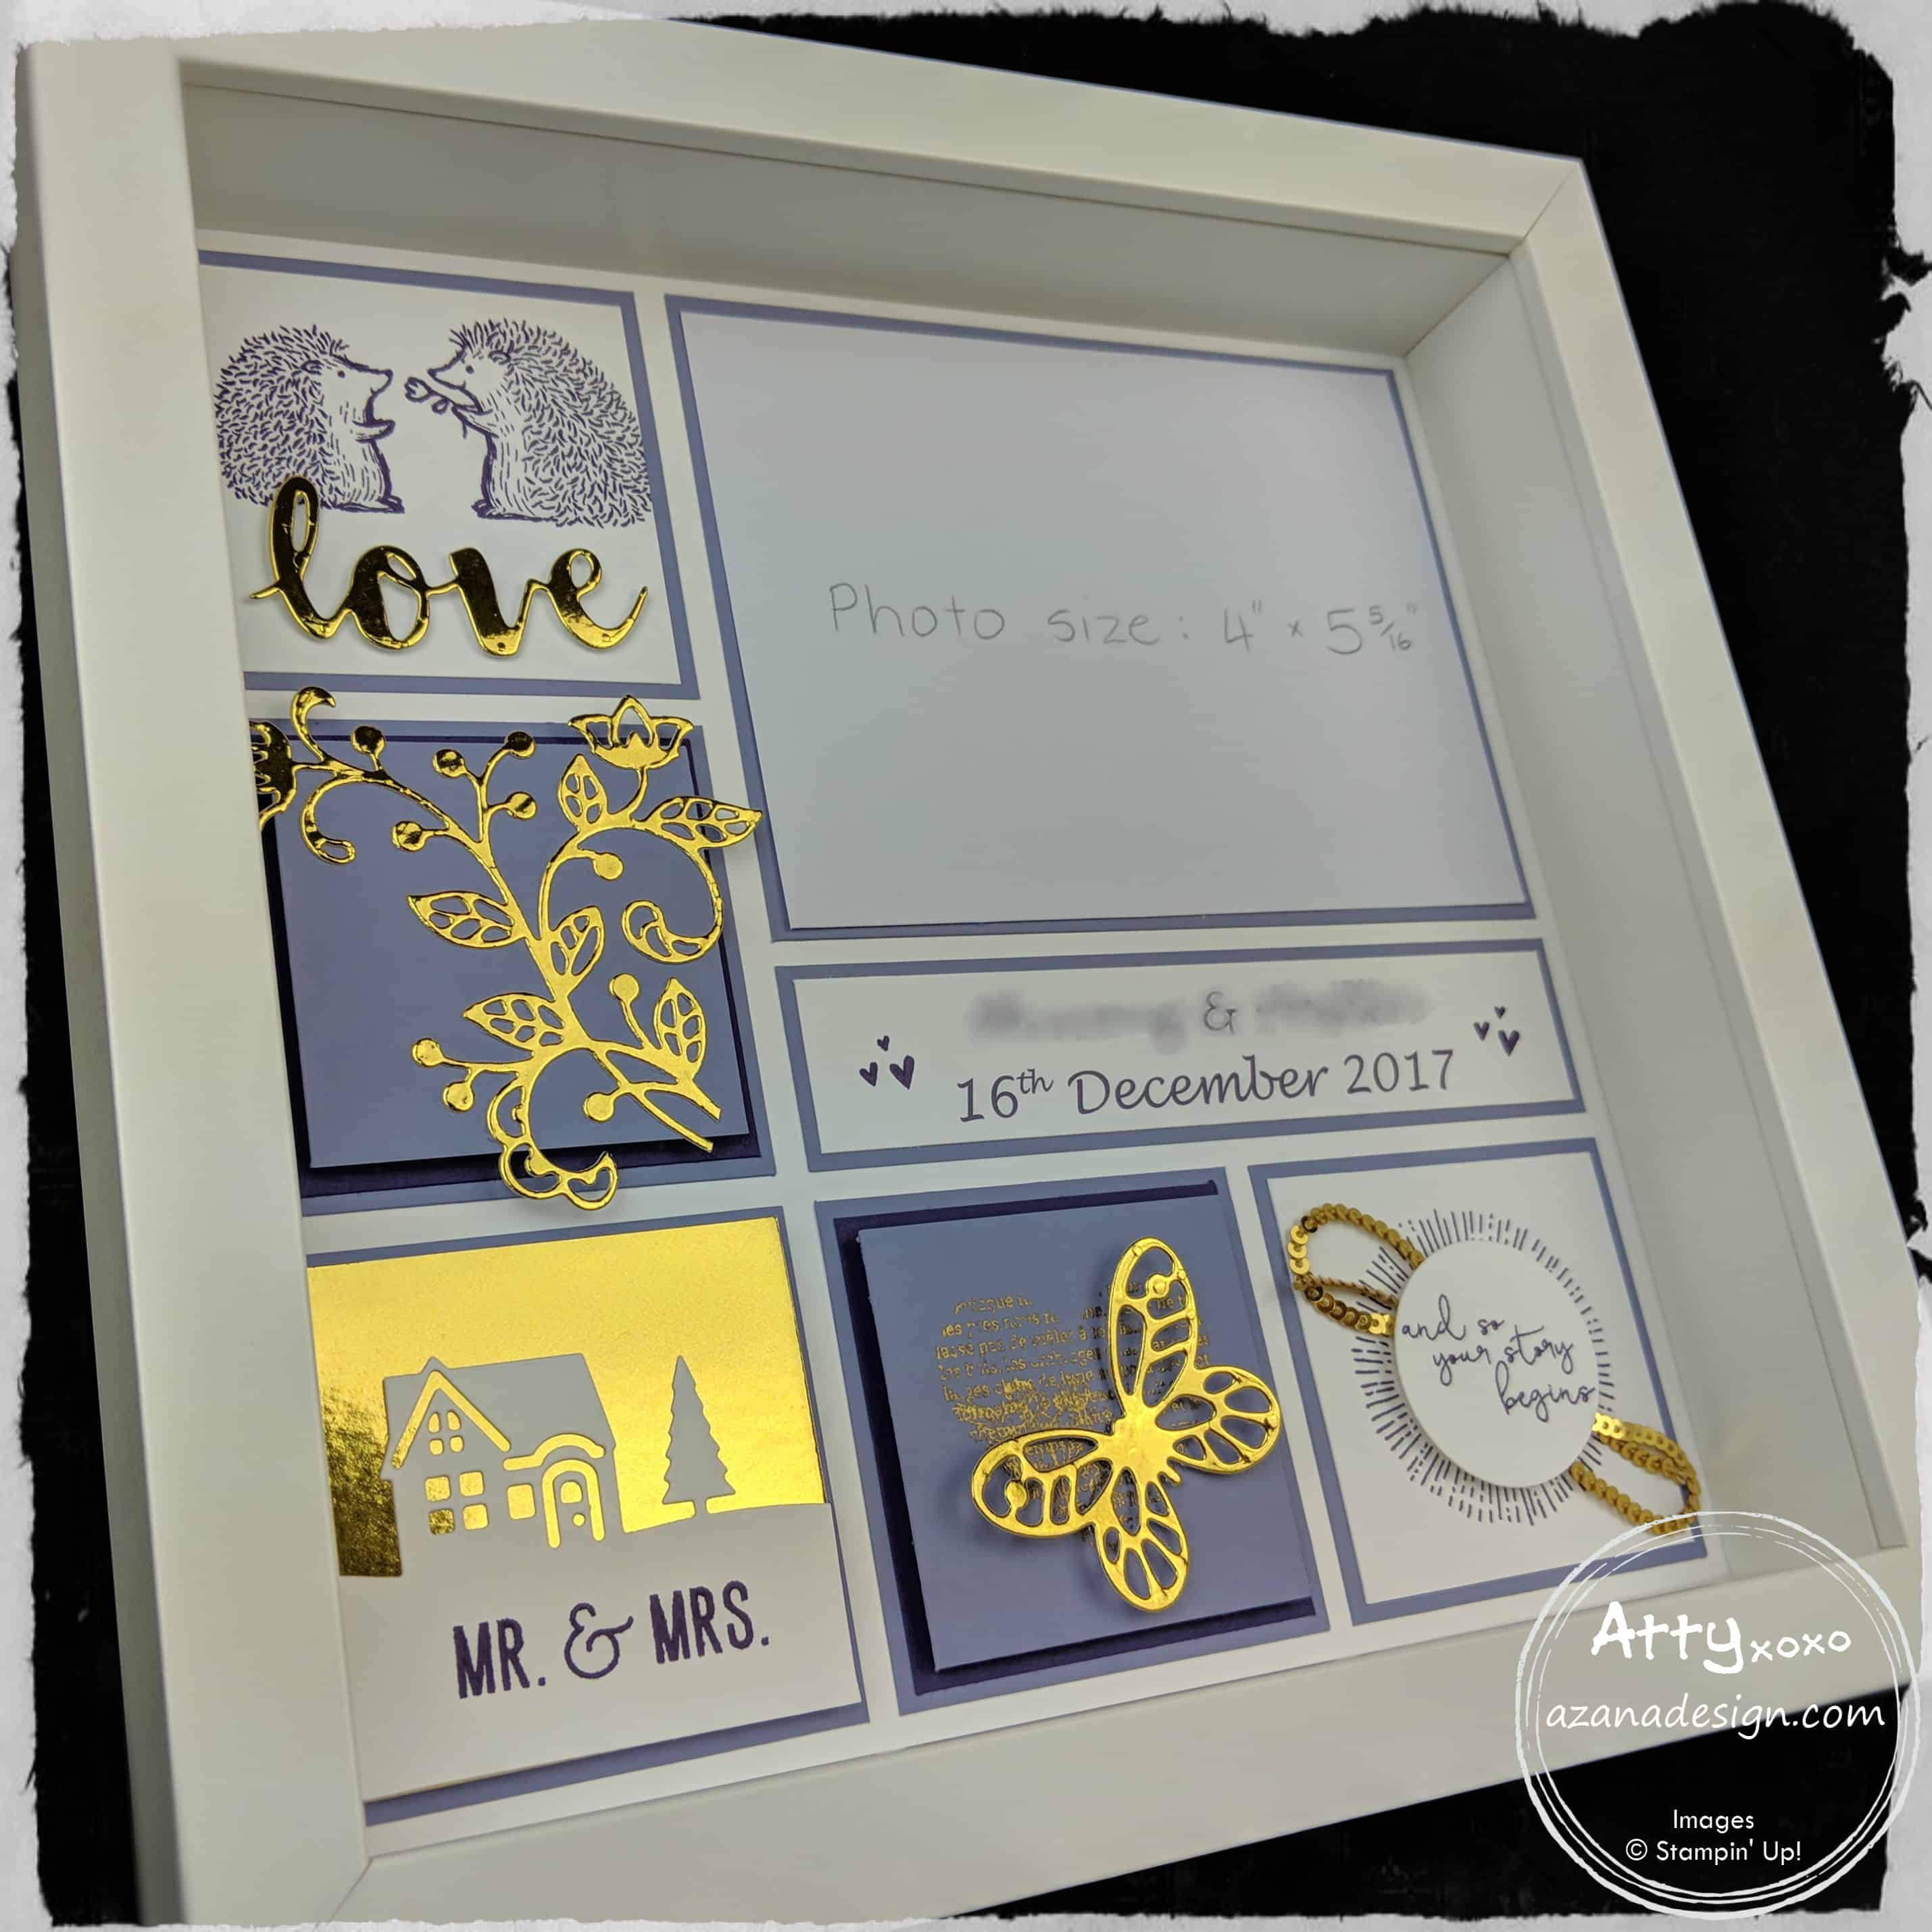
The bride’s favourite colour is purple so I used Wisteria Wonder and Elegant Eggplant and added touches of gold foil for some bling! I used lots of different stamp sets, some current, some retired – whatever I had in my stash (and borrowed from my upline!) that kept with the theme of love. The heart stamp (bottom middle square) has been gold heat embossed and there’s some extra bling with the gold mini sequin trim.
- Flourish Thinlits
- Bold Butterfly Framelits
- Sunshine Wishes Thinlits
- Hometown Greetings Edgelits Dies
- Cheers to the Year stamp set
- Love You Lots stamp set
- Punch Potpourri stamp set
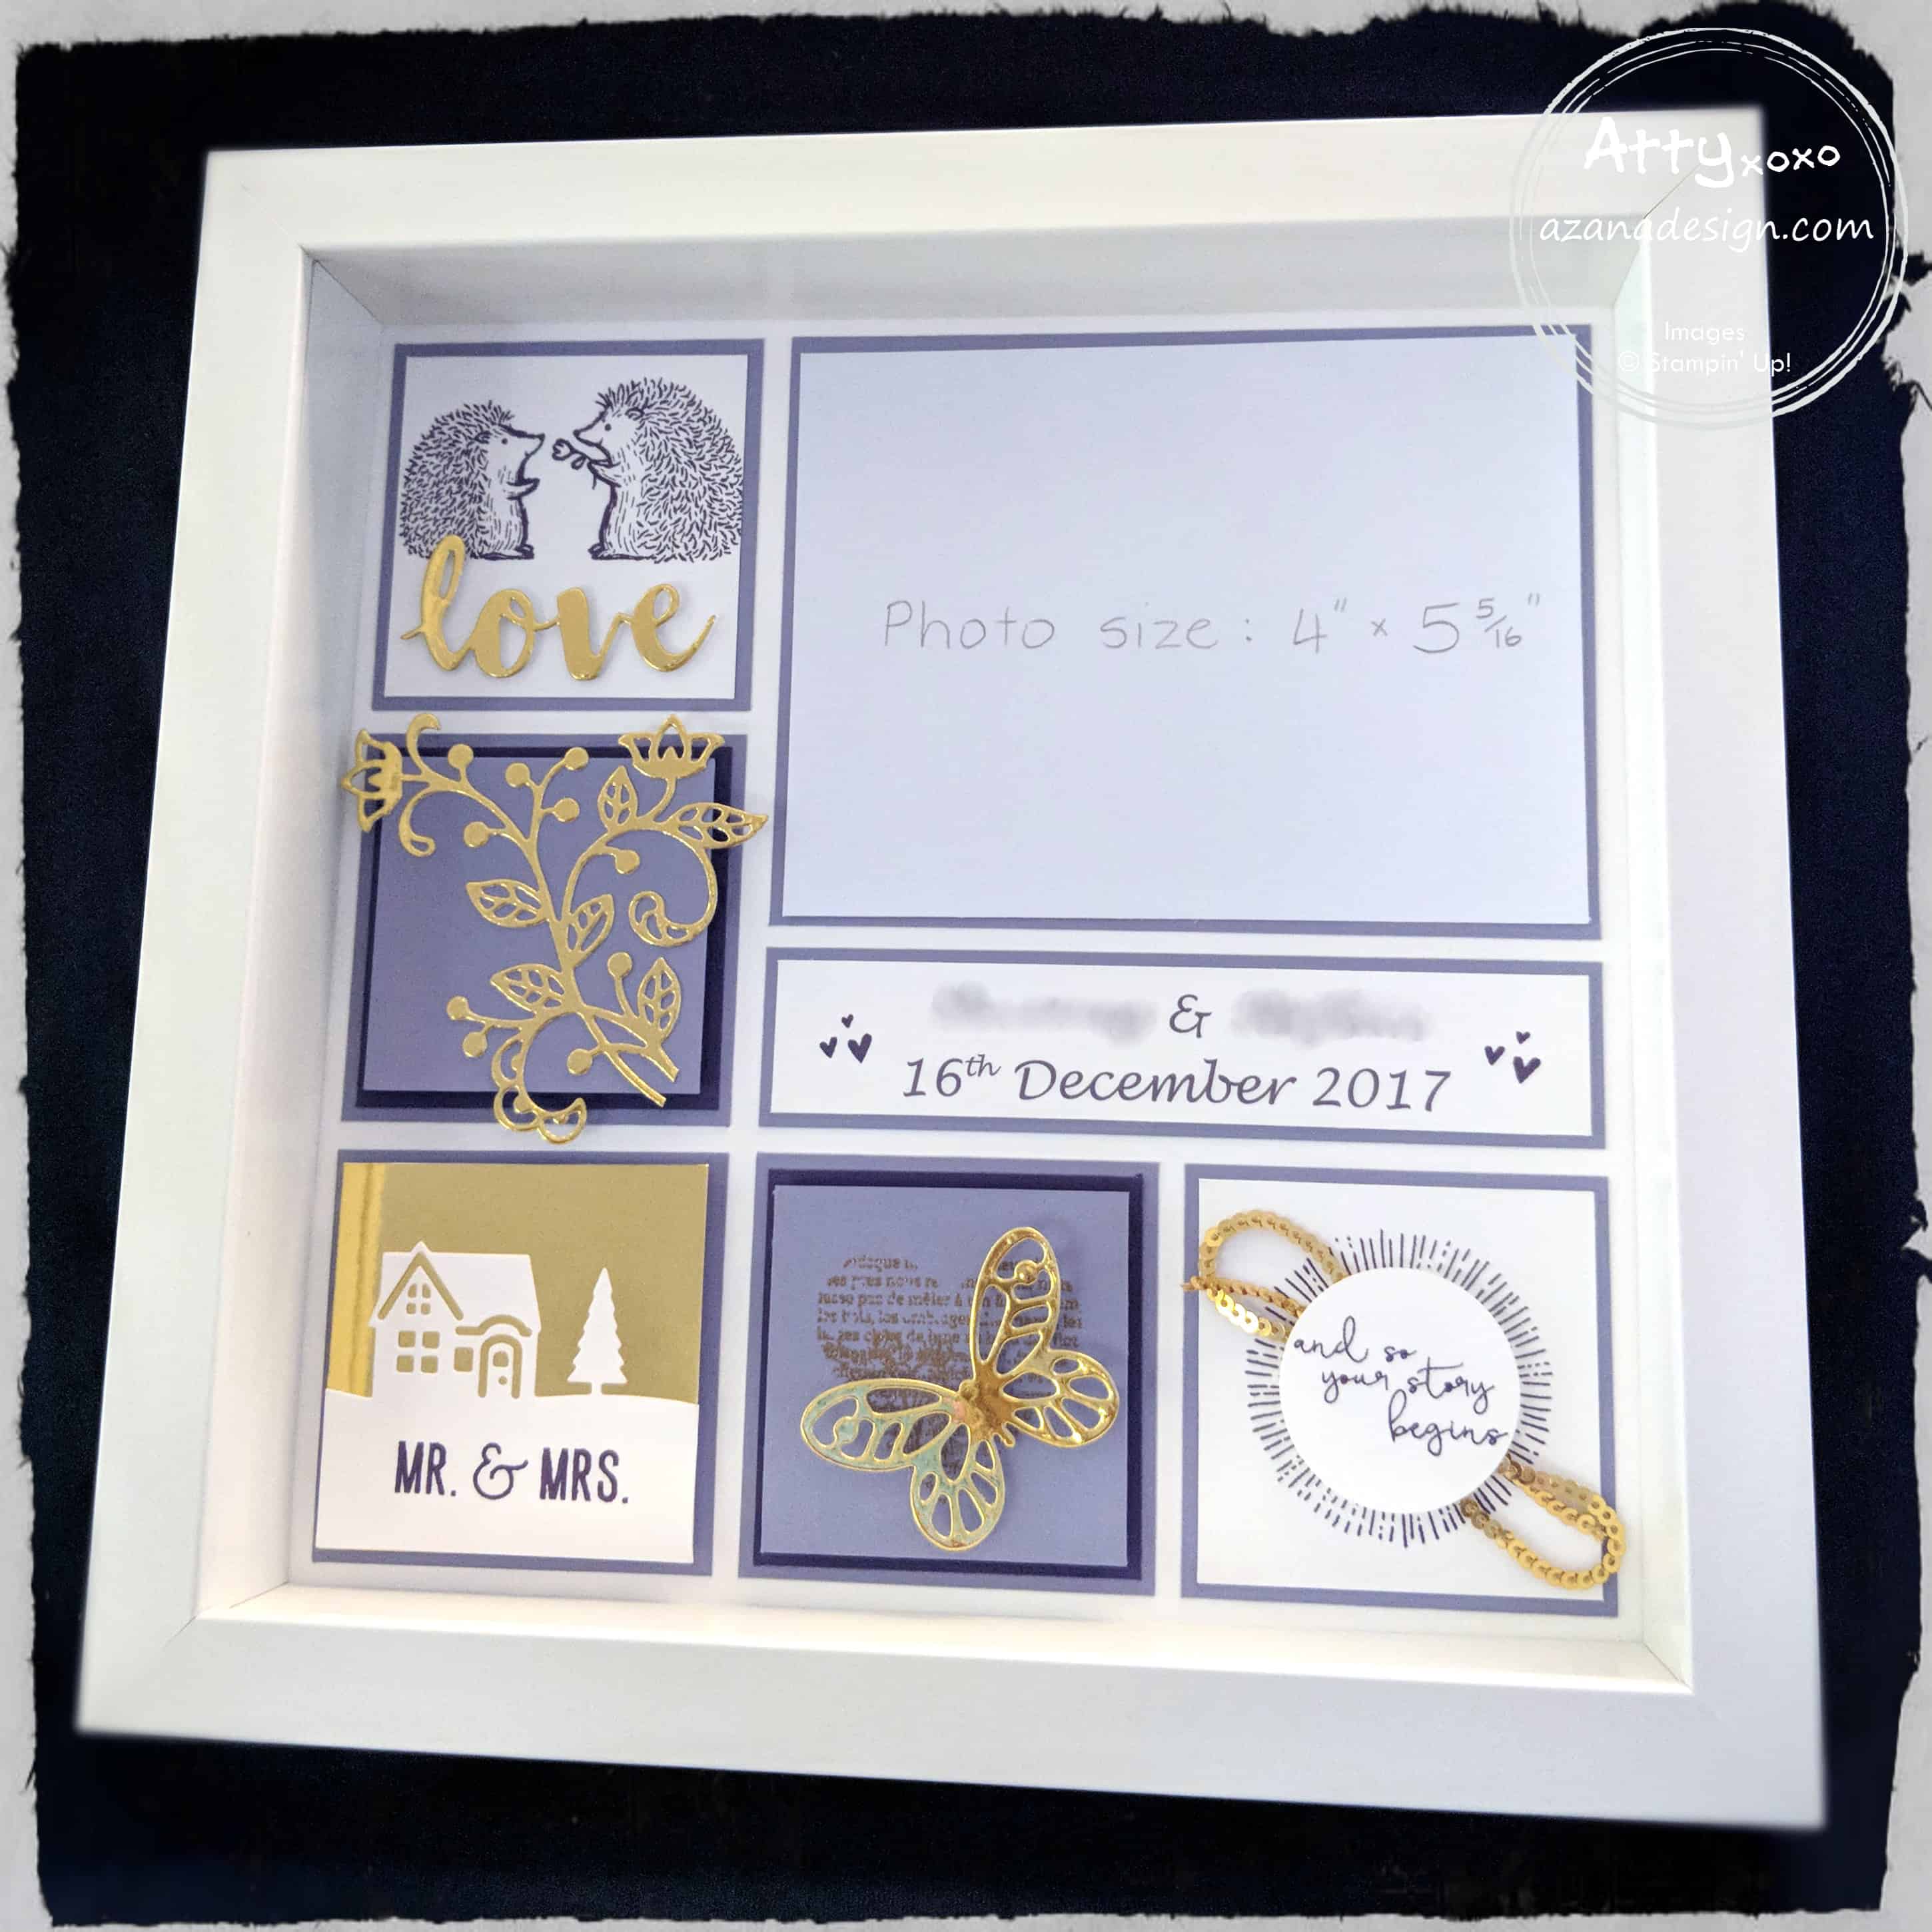
The couple’s name and wedding date were printed onto Whisper White cardstock. I changed the colour of the text in Word to match with the colour scheme. The RGB code for Elegant Eggplant is 96, 74, 110. It was quite a good match, although came out a little lighter. I then stamped the little hearts from the Cheers to the Year stamp set on either side of the name/date.
I wanted the photo size close to what’s printed at the shops (10 cm x 15 cm) but had to trim it down a bit to fit in with my layout. The photo size ended up being 10 cm x 13.4 cm – so a normal photo will fit, with just a bit trimmed off the sides. The matt for the photo is 10.5 cm x 13.9 cm.
The frame is the 23 cm x 23 cm Ribba from Ikea, which is a nice deep frame, good for getting layers and shadows. The five sampler squares down the left side and across the bottom of the frame measured: 6.8 cm square, and each inner layer was 0.5 cm smaller (so 6.3 cm for the second layer and 5.8 cm for the third layer). I left a 1 cm margin from the edge of the cardstock and a 0.3 cm gap in between each element.
The rectangular banner with the name and date on it measures 2.6 cm x 13.4 cm and the matt measures 3.1 cm x 13.9 cm.
I originally did this project in inches, so if you find this more useful, the measurements in inches are below:
- Photo: 4″ x 5 5/16″. Photo matt: 4 3/16″ x 5 1/2″
- Rectangular name/date banner: 1″ x 5 5/16″. Banner matt: 1 3/16″ x 5 1/2″
- Square sampler matt: 2 11/16″. Second layer: 2 1/2″. Third layer: 2 5/16″.
- Cardstock base size: 9 1/16″ square.
- Edge distance: 3/8″
- Spacing between sampler squares: 1/8″
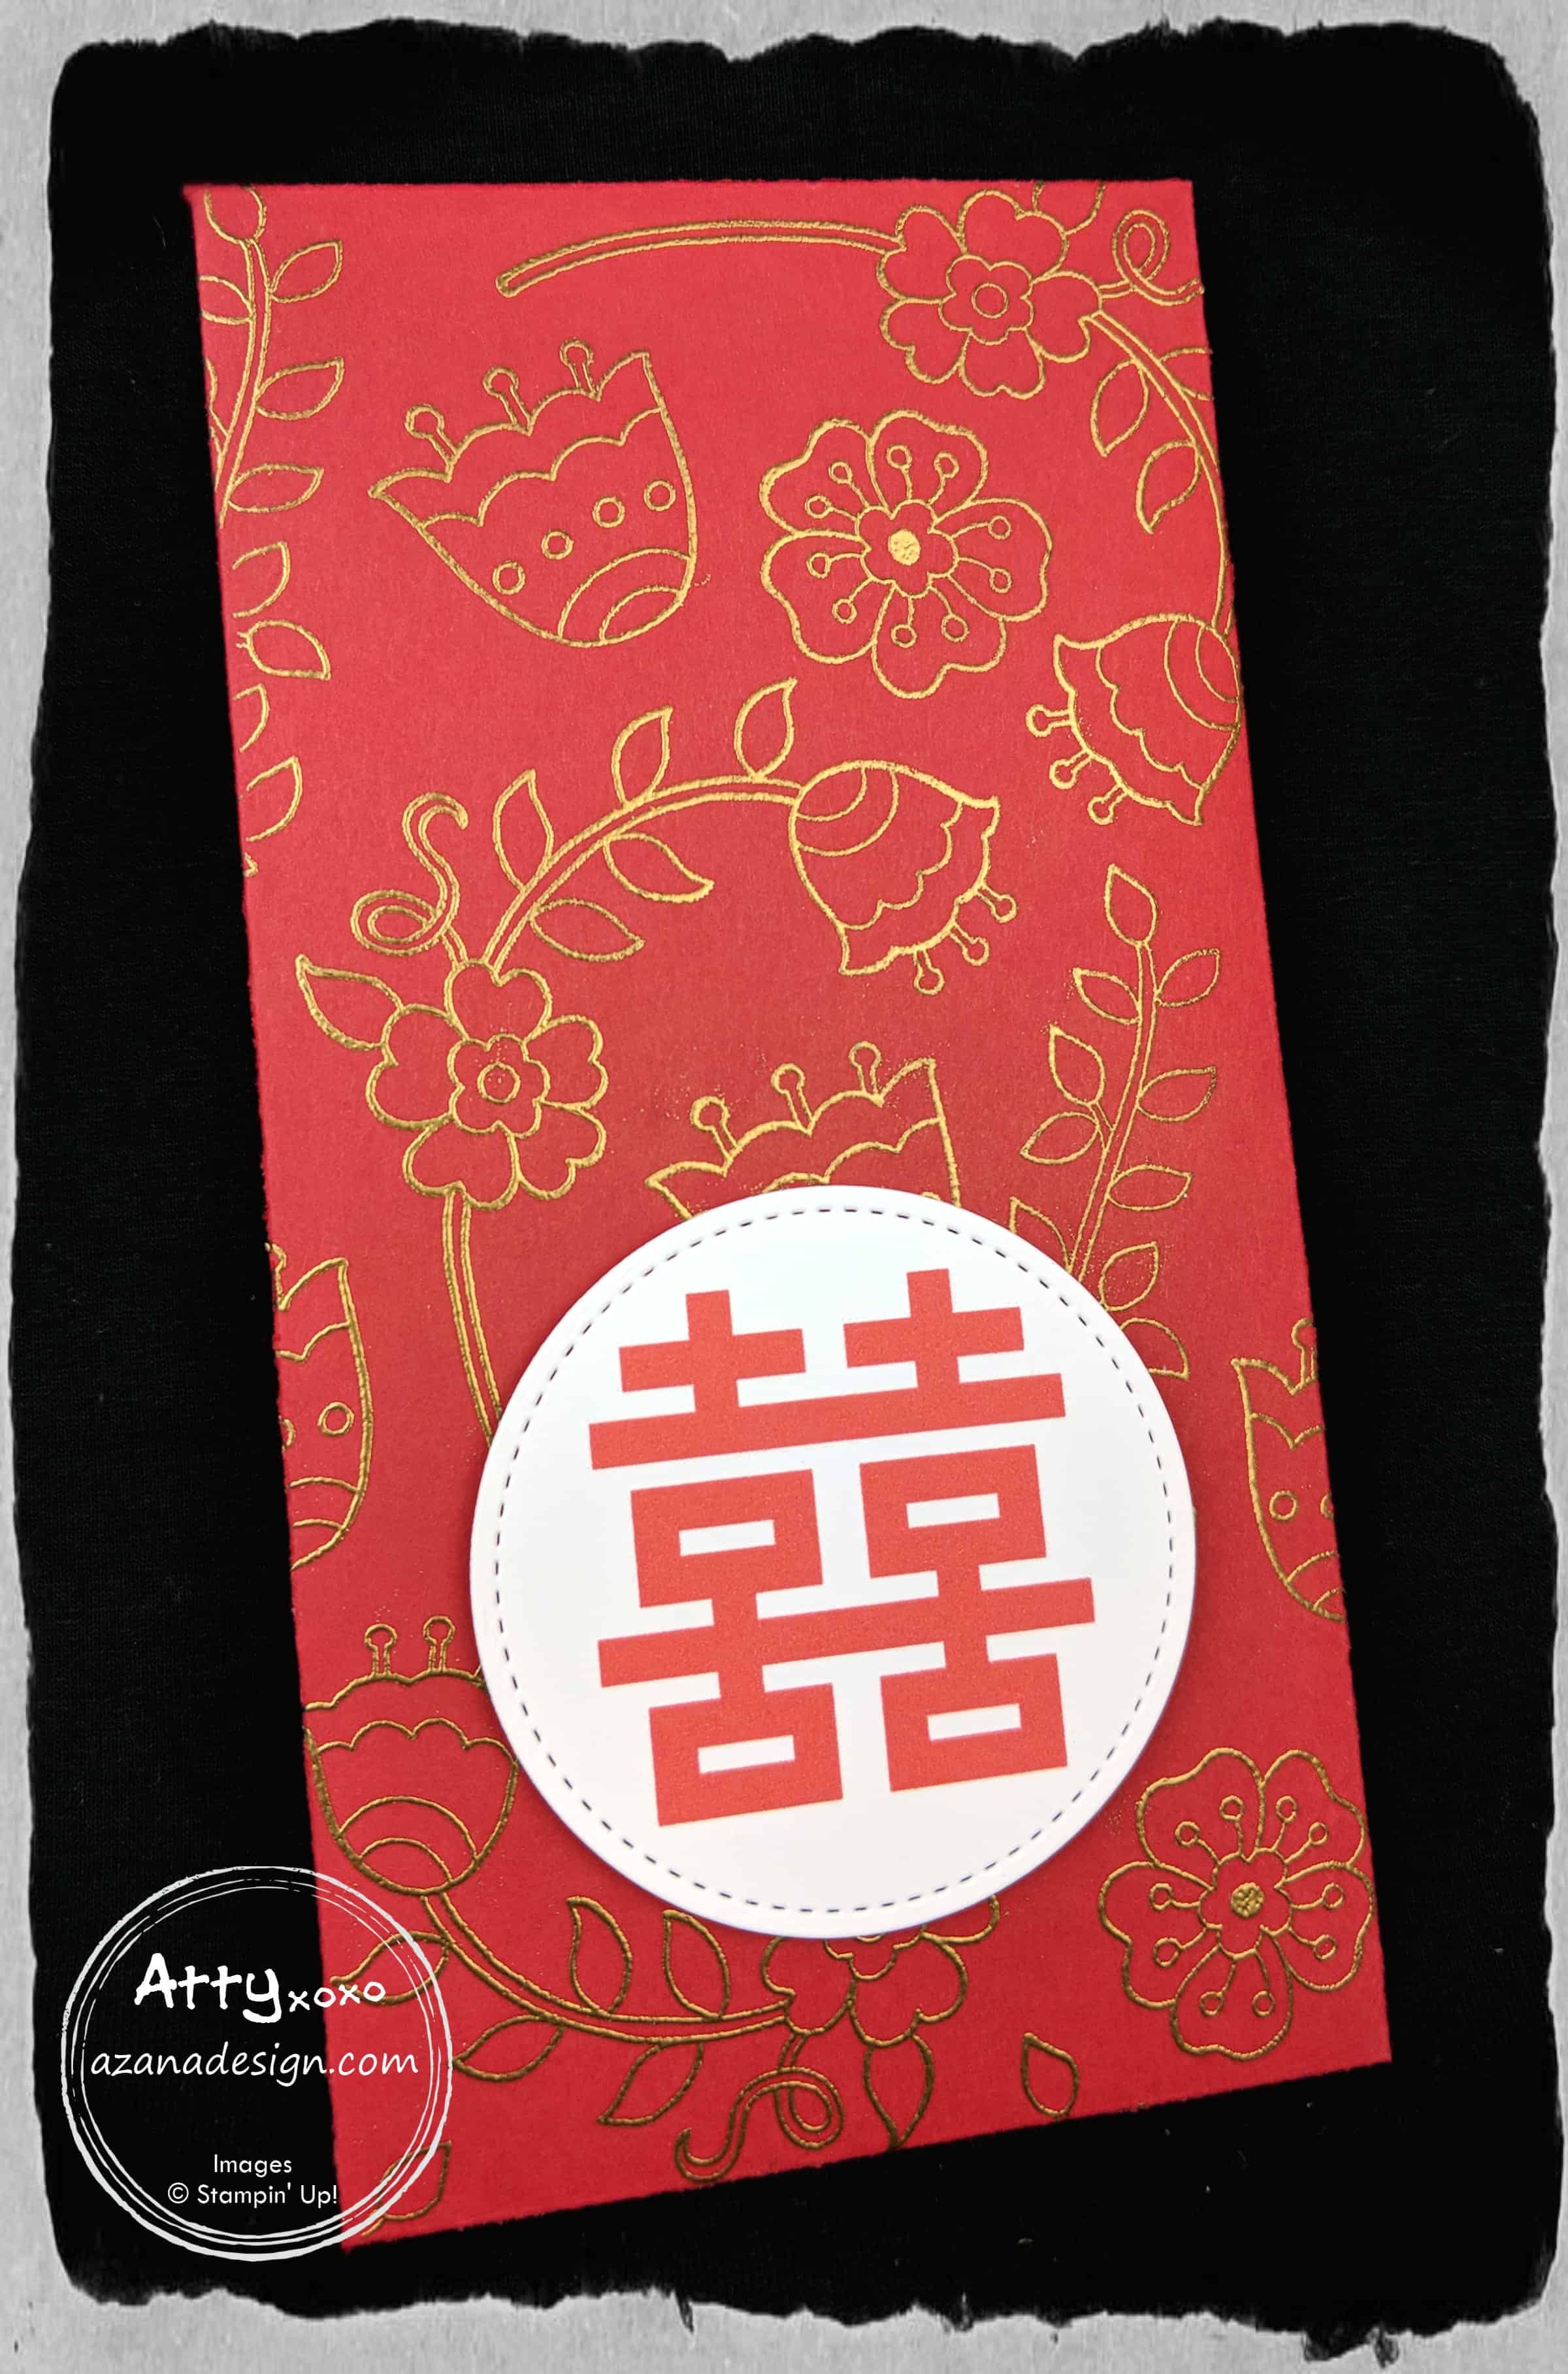 For the envelope for the wishing well, I decided to make my own red packet using Real Red cardstock and gold embossing powder. I love how it turned out! The background pattern is the flowers and leaves from the Feathery Friends hostess stamp set.
I printed the “double happy” symbol from Google onto some Whisper White cardstock and cut it out using the Stitched Shapes Framelits.
Just a simple little envelope, but so pretty!
.
 About Astrid Bealing
I am an Independent Stampin’ Up! Demonstrator from Brisbane, Australia. I’ve always loved all things craft and finally taken the leap into demonstrating the wonderful products Stampin’ Up! sell, which I’ve been using since 2010.
I will be posting my Stampin’ Up! projects here to inspire you. I also hold monthly card and paper craft workshops from my home in Eight Mile Plains, and sell product Australia wide.